
Incubating Eggs:
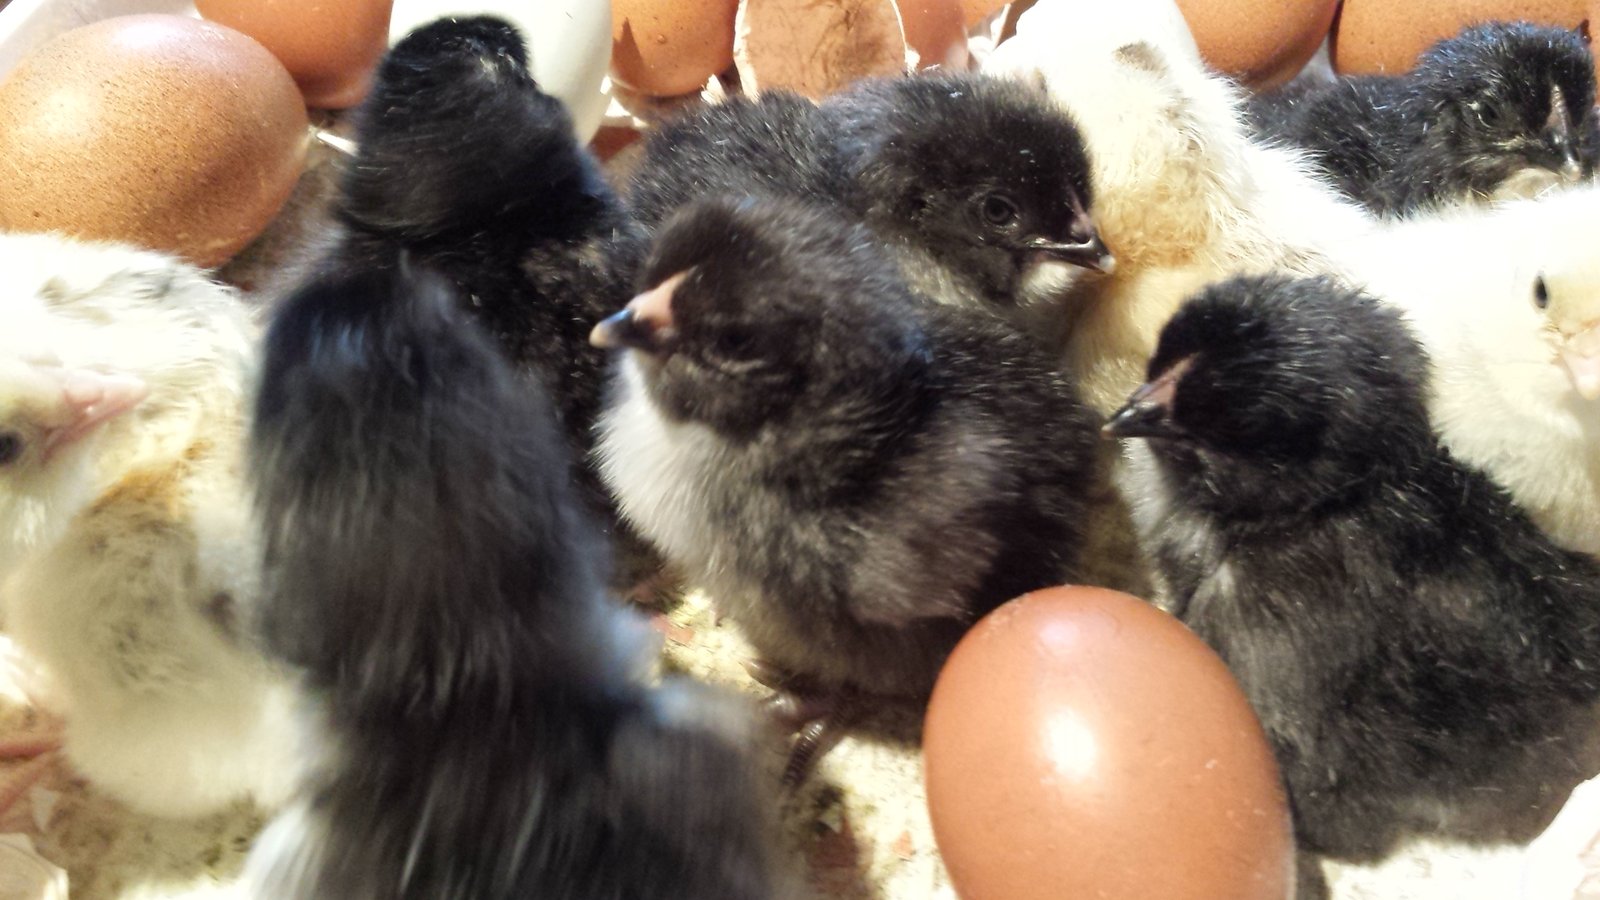
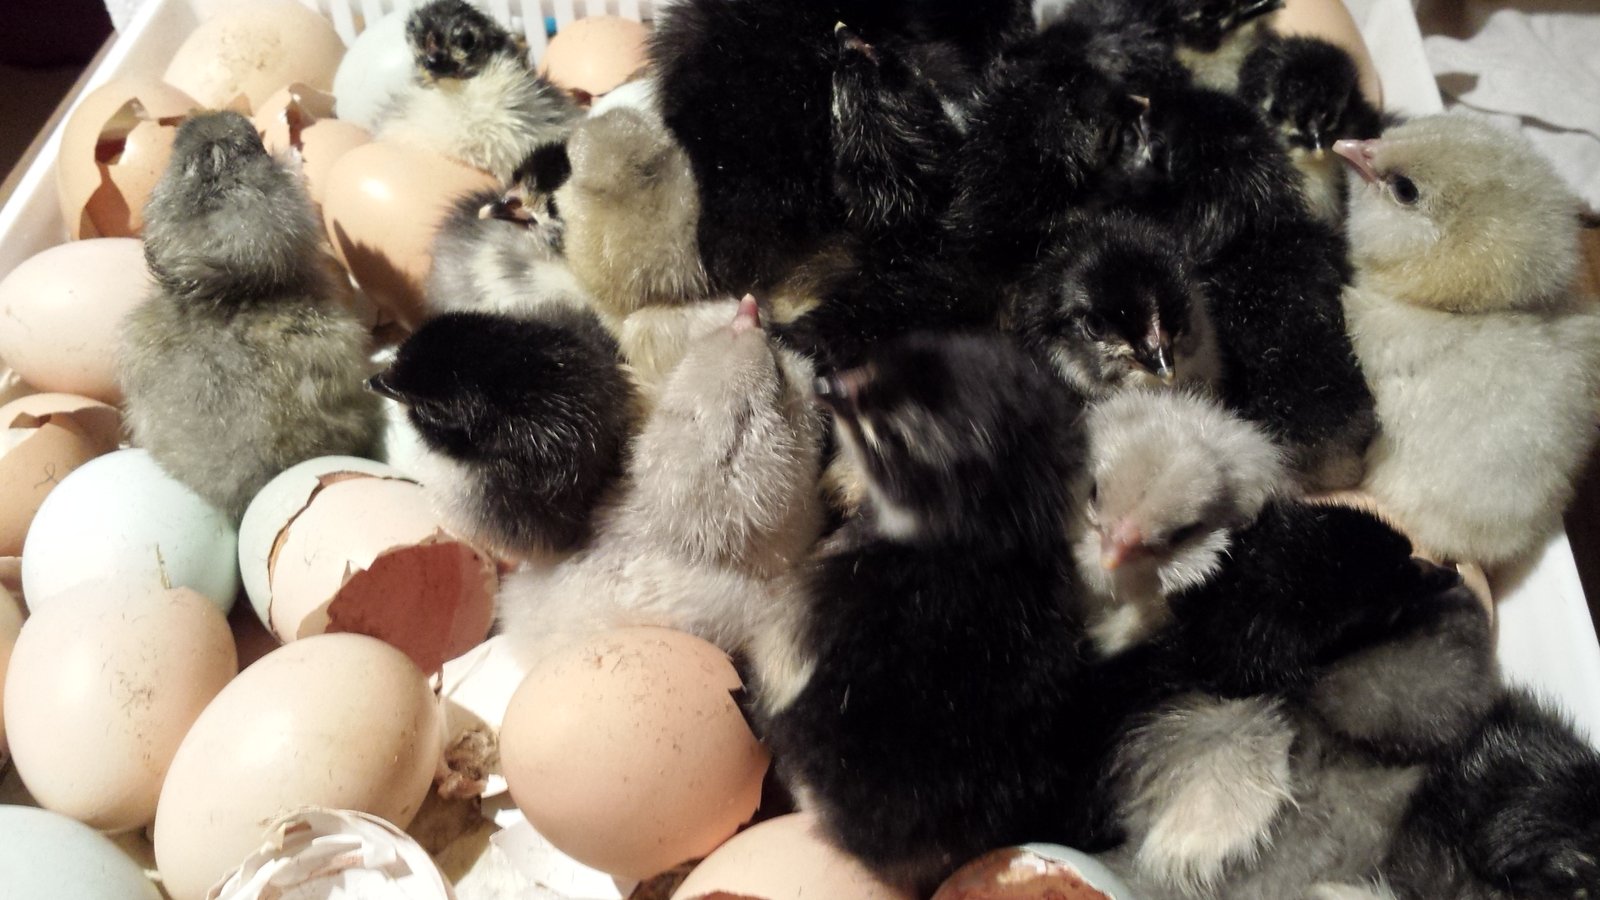
When Your Hatching Eggs Arrive
Please read before placing your eggs in the incubator.
When your eggs arrive, carefully inspect them for cracks or damage that may have occurred during transportation.
Allow shipped eggs to rest for approximately 24 hours in a cool room, with the large end (air cell) facing up, before incubation. If eggs have been delayed in transit, they may be placed in the incubator large end up, with the automatic turner switched off for the first 24 hours.
Wild Acres Incubation Practices
The following settings reflect our own experience and practices at Wild Acres. Incubator models, room temperatures, humidity, ventilation, and egg conditions vary, so these settings may need to be adjusted for your equipment.
- Egg Storage: We store hatching eggs at approximately 10–15°C (50–59°F), with the large end facing up, and turn them daily.
- Chicken Eggs: During cooler spring conditions, we generally incubate at 37.4–37.5°C (99.3–99.5°F), with approximately 47–49% humidity.
- Hatch Day: We generally increase humidity to approximately 55–59% for chicken eggs.
- Warmer, Drier Conditions: During hot, dry weather, we may increase incubation humidity to approximately 49–56%. Room conditions and air-cell development should be considered when making adjustments.
- Indian Runner Duck Eggs: We may use slightly higher humidity, around 60–62% during hatching, and adjust temperature according to the room conditions and how the ducklings are developing.
Monitoring air-cell development can help determine whether humidity adjustments are needed.
Important: These are guidelines based on our own incubation experience. We are happy to share advice, but we cannot guarantee hatch rates or outcomes. Your incubator, environment, egg handling, and incubation practices will all influence your results.
Incubating eggs suffer much more from higher temperatures than they do from lower temperatures. Within a range of 1 degree Celsius, differences can damage the embryos and make it harder for them to hatch.
Incubating Eggs & Raising Healthy Chicks
Helpful Tips from Wild Acres Farm
Hatching eggs requires patience, preparation, and careful attention. The following information is based on our experience raising poultry at Wild Acres.
Please remember: Every incubator, home environment, and flock is different. These are general suggestions, not guaranteed incubation settings or hatch results.
Spring hatch day. Note the temperature and humidity. The temperature outside and in the room was on the cool side.


Please see our extensive Care Tips and Link Page for more information on hatching eggs, poultry, waterfowl and goat care.
Preparing Your Incubator
- Clean and sanitize your incubator before your eggs arrive.
- Set up your incubator in a room with a stable temperature, good ventilation, and minimal temperature fluctuations.
- Run your incubator for 24–48 hours before setting eggs to make sure the temperature and humidity are stable.
- Follow your incubator manufacturer’s instructions for recommended settings.
Setting & Turning Your Eggs
-
- Wash your hands before handling eggs.
- If turning eggs by hand, mark one side with an O and the other with an X using a pencil.
- Turn eggs at least 3 times daily, following your incubator’s instructions. Automatic turners can make this easier.
- Chicken eggs generally take approximately 21 days to hatch. Indian Runner duck eggs generally take approximately 28 days, although hatch times can vary.
- Stop turning chicken eggs around day 18 and prepare for lockdown according to your incubator instructions. Duck eggs have different incubation requirements.
Candling & Monitoring Development
Use an egg candler or small bright flashlight to check development around days 7–10. Darker or larger eggs may require more time before development is visible.
Remove cracked, damaged, or clearly non-developing eggs when appropriate. Keep track of your hatch dates and monitor temperature and humidity throughout incubation.
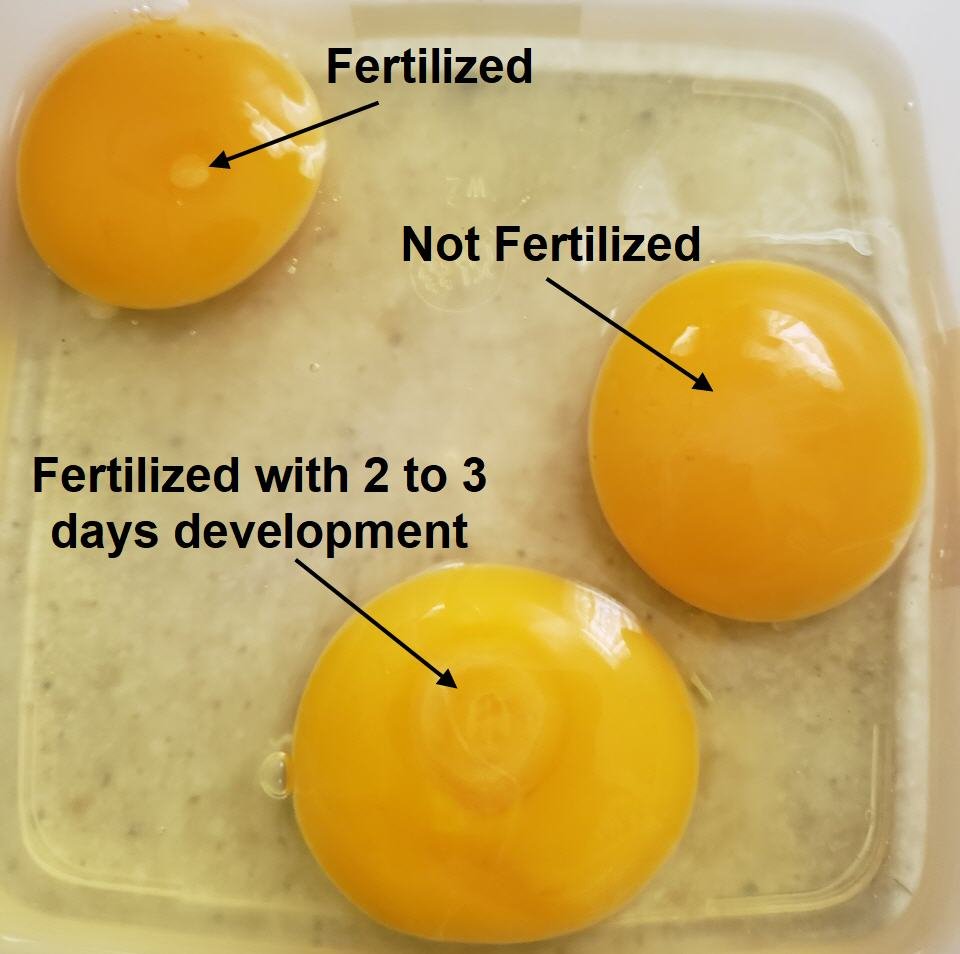
What Is a Blastoderm?
The blastoderm is the small disc on the yolk of a fertilized egg where embryonic development begins. When a fertile egg is placed under suitable incubation conditions, this tiny structure may develop into a chick.
Fertility does not guarantee successful development. Temperature fluctuations, handling, transportation, storage, and incubation conditions can all affect embryo development and hatch results.
For more information, see The Chicken Chick – Facts and Myths About Fertile Eggs.
Weather, Seasonal Conditions & Fertility
Each breeding season is different. Weather conditions directly affect our birds and can influence fertility and egg production. Heat, wildfire smoke, drought, cold temperatures, and heavy rain may all affect seasonal production. These natural conditions are beyond our control, and fertility and egg availability may fluctuate from year to year.
Some chicken breeds may also require warmer seasonal temperatures before they begin breeding consistently and laying eggs. Cooler spring weather can delay reproductive activity in certain breeds.
At Wild Acres, we prefer Brinsea and Sportsman Cabinet incubators for hatching, but even quality equipment and careful incubation cannot guarantee a 100% hatch rate. Every hatch and every breeding season is different for us and our poultry and waterfowl.
Incubator Setup & Daily Operation
- Avoid Opening the Incubator During Hatching: During the final days of incubation and throughout the hatch, try to avoid lifting the incubator lid. Opening it can cause temperature and humidity to drop, which may affect chicks that are hatching. When choosing an incubator, consider the size and location of the viewing window so you can observe the hatch without opening the lid.
- Styrofoam Incubators: If you use a small Styrofoam incubator, follow the manufacturer’s instructions for egg placement and airflow. Keep it on a stable, level surface in a room away from drafts, windows, and direct sunlight. Maintaining a steady room temperature can help the incubator operate more consistently.
- Allow Time for Temperature to Stabilize: When cold eggs are added, the incubator temperature may temporarily drop. It can take several hours for the eggs to warm and the temperature reading to return to its set point. Opening the incubator can also cause temperature and humidity changes. Allow time for conditions to stabilize rather than making repeated adjustments.
- Incubator Capacity: Follow the manufacturer’s recommended egg capacity. Proper spacing and airflow are important, and overfilling an incubator can interfere with consistent temperature and humidity throughout the eggs.
- Turning Your Eggs: Eggs must be turned regularly during incubation unless your incubator has an automatic turning system. If turning by hand, mark one side of each egg with an X and the other with an O using a pencil. In small incubators, turn eggs at least three times daily, following your incubator manufacturer’s instructions. Regular turning is especially important during the first week of development.


Egg Placement
If eggs move or rock around in the incubator tray, small pieces of paper towel can be used to help keep them secure and upright. At Wild Acres, we sometimes use this method to help stabilize eggs in the trays. Make sure the paper towel does not block ventilation or interfere with the turning mechanism.
Temperature & Humidity at Wild Acres
Our incubation settings may vary with the season, room temperature, and humidity.
- Cooler Spring Weather: During cooler months, such as April, we generally incubate at 37.4–37.5°C, with daily humidity around 49–55%.
- Chicken Hatch Day: For a typical chicken hatch, we increase humidity to approximately 58–62%.
- Waterfowl & Turkey Eggs: For ducks, geese, and turkey eggs, we may increase hatching humidity to approximately 60–62%, depending on room dryness, egg conditions, and the incubator being used.
These settings reflect our experience at Wild Acres and are not universal settings for every incubator. Always consider your equipment manufacturer’s recommendations and monitor conditions throughout incubation.

Hot Weather & Room Conditions
- Hot, Humid Weather: During hot, humid weather, especially when room temperatures reach around 30°C, we may need to adjust incubator humidity. Monitor the incubator and egg air-cell development, and make adjustments gradually according to your equipment and incubation needs.
- Air Circulation: At Wild Acres, we use a fan to circulate air in our incubator room. This helps reduce stagnant air and maintain more consistent room conditions.
- Central Air Conditioning: Central air conditioning can make indoor air drier, which may affect the humidity inside your incubator. Keep an eye on humidity levels and adjust as needed.
Air-Cell Development & Incubator Location
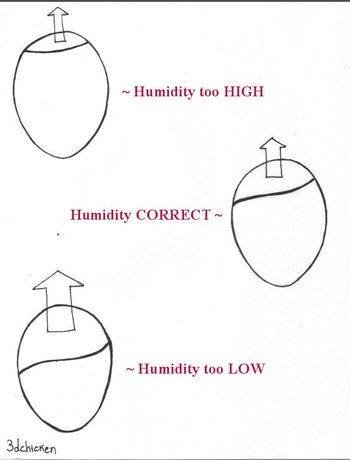
- Monitor Air-Cell Size: Check the air cell inside your eggs during incubation by candling. Its growth helps you determine whether eggs are losing moisture at an appropriate rate. If the air cells are too small or too large for the stage of incubation, you may need to adjust the humidity in your incubator.
- Elevation & Placement: The location of your incubator can make a difference. Room temperature, airflow, drafts, sunlight, and placement at different heights may affect the conditions around your incubator. Heat rises, so temperatures can vary between floor level and higher surfaces. Every incubator is different, and it takes time to understand how yours operates.
- Choose a Stable Location: Place your incubator where room temperature and humidity remain as consistent as possible. Avoid areas near windows, exterior doors, heating vents, and direct sunlight.
- Our Experience at Wild Acres: We have noticed that even two identical incubators of the same model and age can perform differently in the same room. One of ours, placed on a table in a cooler corner, tends to hold humidity better and requires less frequent water refilling. Another, placed closer to the centre of the room, needs water added more often and has not produced the same hatch results. This is why we recommend taking time to understand your own incubator and finding the location where it performs best.
Humidity, Ventilation & Egg Handling
Humidity & Natural Brooding
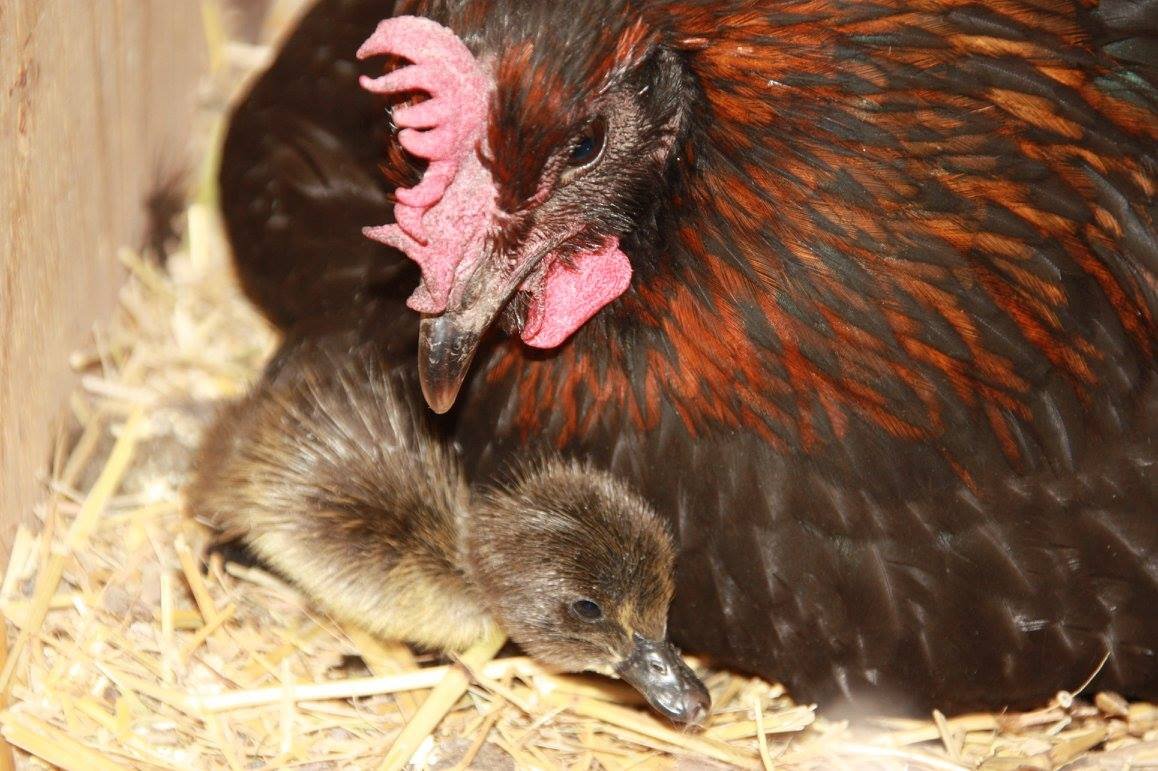
When we measured the relative humidity beneath our broody bantam hens, standard-sized hens, and turkeys, we observed readings between approximately 52–65%. However, a broody bird naturally shifts position and takes breaks from the nest, allowing eggs to experience periods of cooling. Some incubators offer automatic cooling periods, but these settings and their suitability vary by model.
At Wild Acres, we recommend monitoring humidity carefully rather than assuming that higher humidity is better. Excessive humidity can prevent eggs from losing enough moisture during incubation and may affect successful hatching. Candle your eggs and monitor air-cell development to help determine whether adjustments are needed.
Ventilation
- Keep incubator vents at least partially open during incubation, following your manufacturer’s instructions. Many incubators require more ventilation as embryos grow and their oxygen needs increase.
- During hot weather, pay particular attention to airflow and room temperature.
- During the final days of incubation and throughout the hatch, adequate ventilation is essential. Open vents as recommended by your incubator manufacturer. Never block ventilation openings to try to control humidity.
- At Wild Acres, we also use a fan to circulate air in our incubation room and help maintain more consistent room conditions.
Ventilation is especially important as chicks develop and hatch. Insufficient airflow can deprive embryos of oxygen and contribute to unsuccessful hatches.
Gentle Egg Handling
Handle hatching eggs carefully before incubation and whenever candling or repositioning them. Rough handling, jarring, or dropping eggs can damage developing embryos and reduce hatch success.
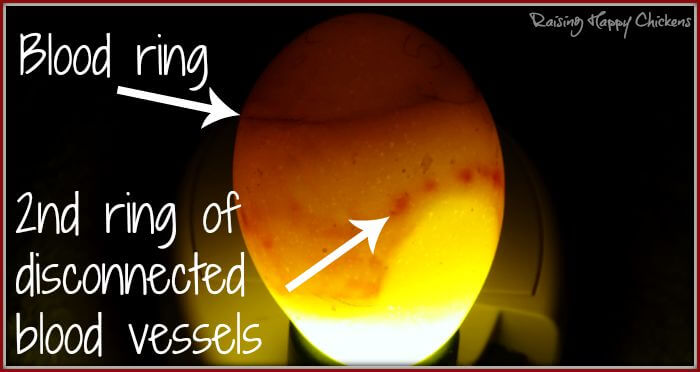
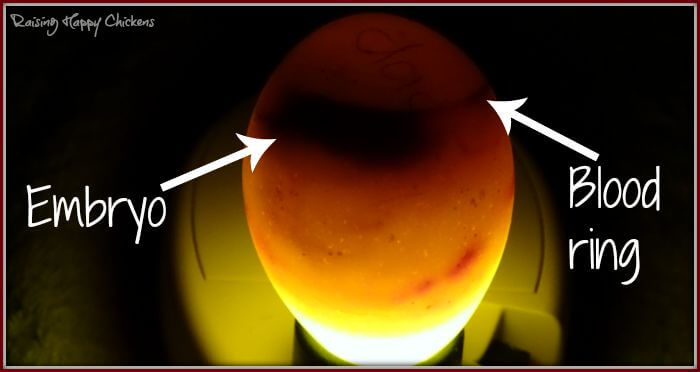
During candling, handle eggs gently and avoid sudden movements. Eggs showing a blood ring or other clear signs of early embryo death should be removed from the incubator.
Blood Rings
A blood ring may appear as a reddish circle around the inside of an egg when an embryo has stopped developing. It is often visible during candling. These eggs should be removed once you are confident that development has stopped.


Candling, Hatch Times & Hatch Day
Candling Dark-Coloured Eggs
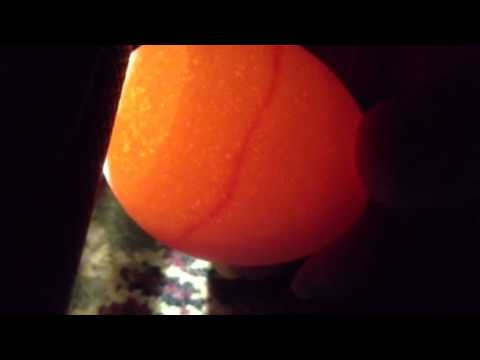
Some eggs are more difficult to candle than others. Dark brown Marans eggs, along with Ameraucana, Olive Egger, and other darker-shelled eggs, can make it difficult to see embryo development clearly. A bright egg candler and a dark room can help. Don’t be concerned if you cannot see as much development in these eggs as you can in lighter-coloured eggs.
Incubation & Hatch Times
- Chicken Eggs: Most chicken eggs take approximately 21 days to hatch. Chicks may take 12–24 hours or longer to emerge after pipping (making the first hole in the shell). Temperature fluctuations or cooler incubation conditions can delay hatching.
- Indian Runner Ducks: Generally take approximately 28 days to hatch.
- Geese: Incubation commonly takes around 28–35 days, depending on the breed.
- Turkeys: Generally take approximately 28 days to hatch.
Hatch times can vary, and not every egg will hatch at exactly the expected time.
Protecting Humidity During Hatch
Resist the urge to open the incubator during the final days of incubation and throughout the hatch. Opening the lid allows warm, humid air to escape, which can cause humidity to drop. This may make the membranes surrounding hatching chicks dry and more difficult to work through.
Use the viewing window to observe the hatch whenever possible. Keep the vents open as recommended by your incubator manufacturer to provide adequate airflow, and avoid unnecessary lid openings.

Hatch Day, Chick Safety & Troubleshooting
Be Patient During the Hatch
- Avoid Opening the Incubator: An egg with a pip (the first small hole made by a chick breaking through the shell) is at a delicate stage. Opening the incubator can cause warm, humid air to escape, allowing the membranes inside the shell to dry. This can make it more difficult for chicks to hatch. Rescuing one chick too early can also put other chicks still hatching at risk. Resist the urge to open the lid unless absolutely necessary.
- Allow Time to Hatch: Chicks can take 12–24 hours, or sometimes longer, to work their way out of their shells after pipping. This is a natural process, so try not to panic if it seems to take a long time.
- Helping Chicks Hatch: Intervention is not always necessary or beneficial. Chicks that struggle to hatch may have developmental problems, weakness, or other difficulties. Assisting too early can cause bleeding, injury, or infection. If you are inexperienced, seek advice from an experienced poultry breeder or veterinarian before attempting to assist.

Temperature, Ventilation & Chick Behaviour
- Watch for Panting: Chicks that are excessively panting may be too hot or experiencing poor air quality or inadequate ventilation. Check the incubator temperature and make sure the vents are not blocked. Increase ventilation as recommended by the manufacturer and investigate the cause before making temperature adjustments.
- Temperature Matters: Developing embryos are particularly vulnerable to overheating. Even relatively small temperature variations can affect development and hatch success. Maintain a stable temperature throughout incubation and use a reliable thermometer to check your incubator.
- Early or Late Hatches: If chicks consistently hatch earlier or later than expected, check your thermometer calibration and review your incubation records. An early or late hatch can be related to temperature, but breed, egg size, storage, and other factors can also affect timing. Avoid automatically changing the temperature by 0.5°C for an entire future incubation without checking these factors.
- Incubator Location: Keep your incubator in a stable room away from drafts, windows, direct sunlight, and sudden temperature fluctuations. The location can affect how consistently the incubator maintains temperature and humidity.


-
After the Chicks Hatch
- Allow Chicks to Dry: Newly hatched chicks need time to dry and become active. They can generally remain in the incubator until they are dry and reasonably fluffy, often around 12–24 hours, depending on the hatch and the needs of any remaining eggs.
- Prepare the Brooder: Have clean bedding, appropriate warmth, fresh water, and chick starter feed ready before moving chicks out of the incubator.
- Food & Water: Chicks have a yolk reserve that provides nourishment during the first period after hatching. However, once they are moved to the brooder, provide access to fresh water and appropriate starter feed right away. Do not deliberately withhold food or water.
- Handle Gently: Newly hatched chicks are delicate. Avoid excessive handling, unnecessary disturbance, and prolonged exposure to cold. Give them time to settle into their brooder and become comfortable.
- We are happy to share our experience and answer questions about incubating and raising poultry. However, incubation conditions and hatch results vary, and advice from Wild Acres cannot guarantee a particular hatch rate or the survival of every chick.
https://the-chicken-chick.com/facts-and-myths-about-fertile-eggs/
https://the-chicken-chick.com/chicken-embryo-development-views-from/
How to Spot Problems of Newly Hatched Chicks Chicken Health For Dummies

Introducing New Birds & Flock Biosecurity
Quarantine New Birds
Please do not mix newly purchased chicks or birds from another farm directly into your existing flock.
New birds should be kept separate and monitored for at least 30 days before being introduced to your established flock. This quarantine period helps reduce the risk of spreading disease and allows you to watch for signs of illness, parasites, or unusual behaviour.
Use separate feeders, waterers, and equipment for quarantined birds, and wash your hands between caring for different groups.
Protecting Your Flock from Wild Animals
Wild birds, rodents, mice, and other animals can carry disease-causing viruses, bacteria, and parasites that may affect your poultry.
To help protect your flock:
- Keep poultry feed and water away from wild birds and other animals.
- Store feed in sealed, waterproof, rodent-resistant containers.
- Promptly clean up spilled feed and litter to avoid attracting mice and other unwanted visitors.
- Keep coops, feed storage areas, and water stations clean.
- Check regularly for signs of rodents or wild animal activity.
Good sanitation and biosecurity practices help protect the health of your birds and reduce the risk of disease entering your flock.
A healthy flock starts with good care, cleanliness, and prevention!


Feeders & Waterers
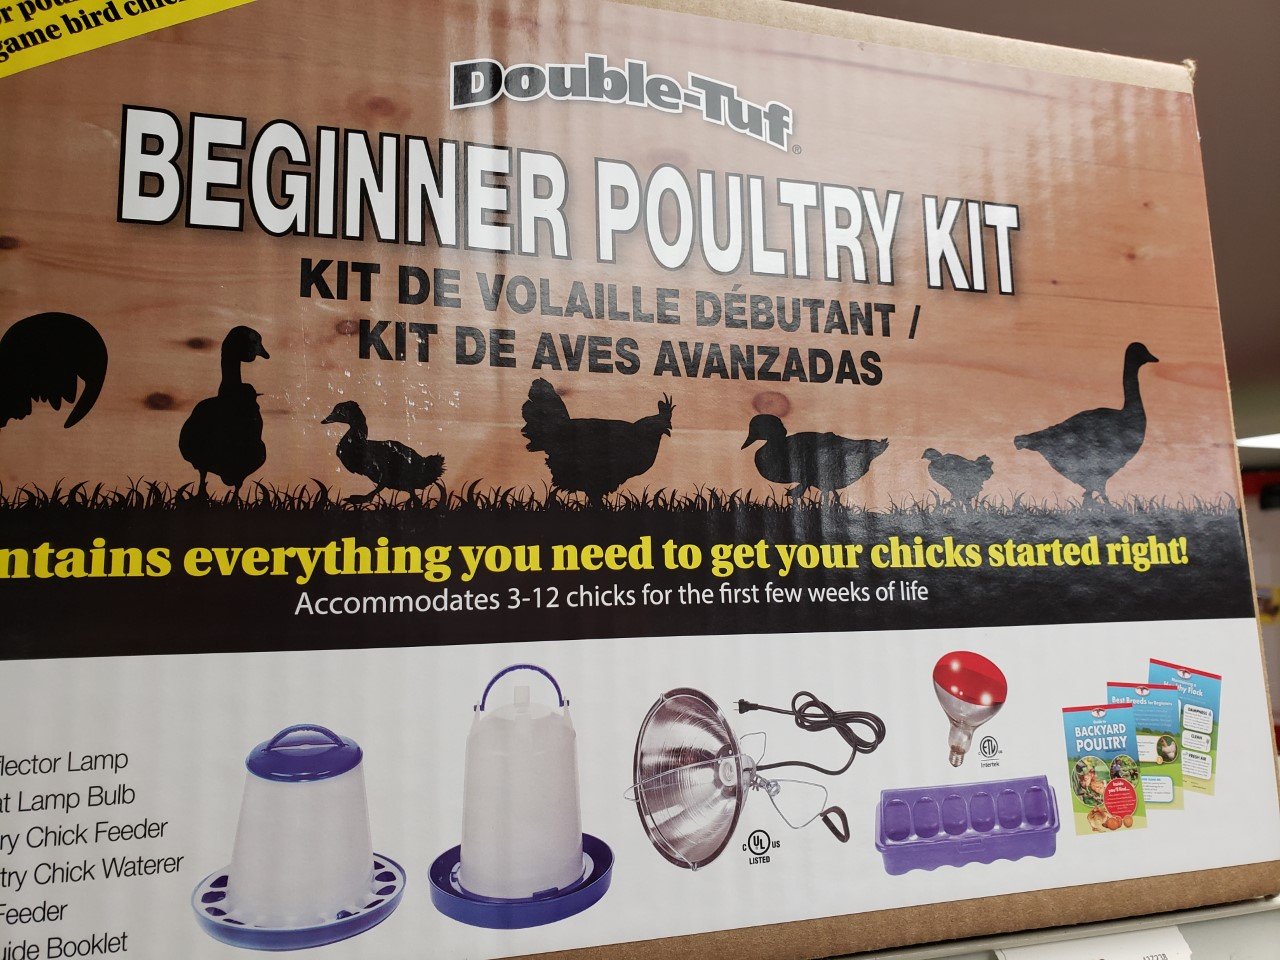
When introducing chicks to the brooder, gently dip each chick’s beak into the water once to help it recognize where to drink. Make sure it can swallow normally and return it safely to the brooder.
- Keep food and water close to the heat source, but never directly underneath a heat lamp.
- Provide fresh, clean water and change it 2–3 times daily, or more often if it becomes dirty.
- Keep waterers free of bedding and droppings to help prevent contamination.
- Raise waterers and feeders on blocks or hang them as chicks grow to help keep them clean and reduce spills.
Always use shallow chick-safe waterers to help prevent drowning.
Preparing Your Brooder
This is an excellent article to read: Brooding Temperatures for Small Poultry Flocks
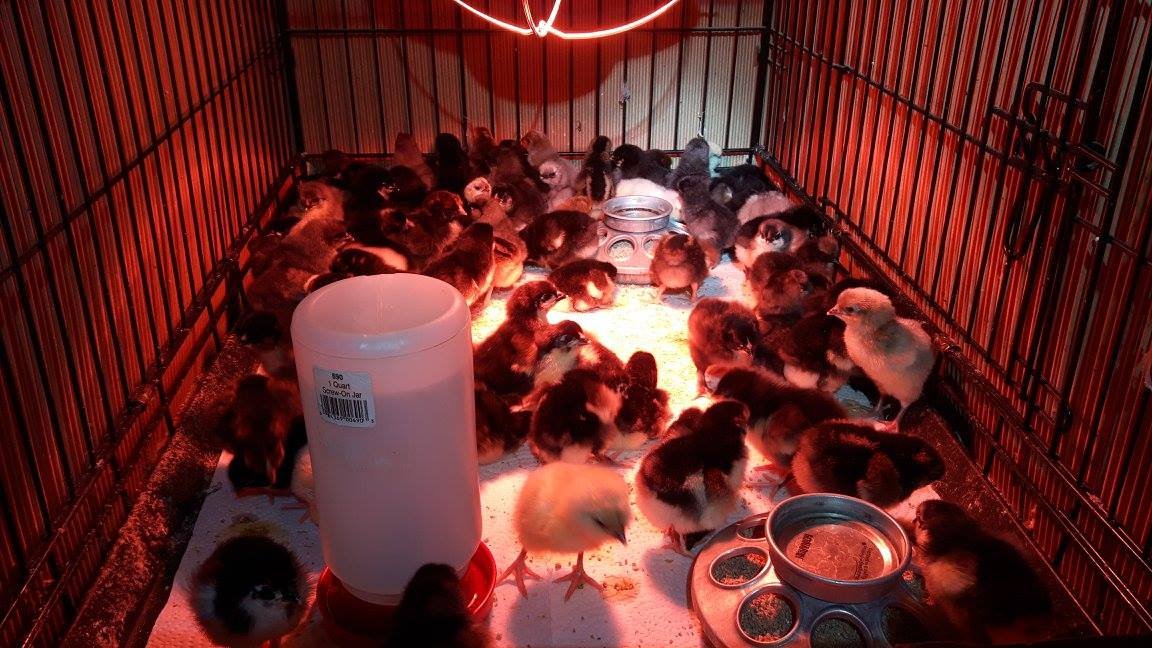
Note the 18-inch brooder guard paper/cardboard surrounding the outside of the cage to keep drafts out and to keep the chicks warm.
Brooder Setup, Warmth & Cleanliness
- Brooder Guard: An 18-inch cardboard guard helps contain young birds and protect them from drafts.
- Heat & Temperature: Newly hatched chicks generally need a warm brooding area of approximately 32–35°C (90–95°F) to start. Use a thermometer at bird level and adjust as they grow. Ducklings, poults and smaller breeds may have different needs.
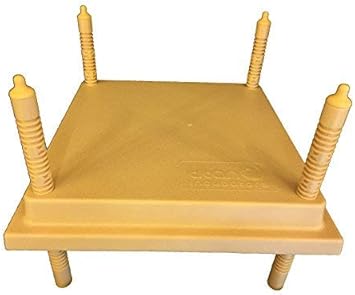
- Heat Lamps & Heating Plates: Secure heat lamps properly and follow manufacturer safety instructions. A brooder heating plate is another option, providing a sheltered warm area. Adjust its height as birds grow and allow enough space for them to move away from the heat.
- Watch Their Behaviour: Huddling and loud peeping can indicate they are too cold; panting, open beaks or moving away from the heat can indicate they are too warm. Comfortable birds will move around, eat, drink and rest.
- Cleanliness: Provide clean, dry bedding, good ventilation without drafts, fresh food and water, and regularly cleaned feeders and waterers. Replace wet bedding and provide suitable chick grit when needed.
Have your brooder prepared before bringing chicks, poults, ducklings or goslings home. Young birds need warmth, protection and a clean environment to get off to a healthy start.

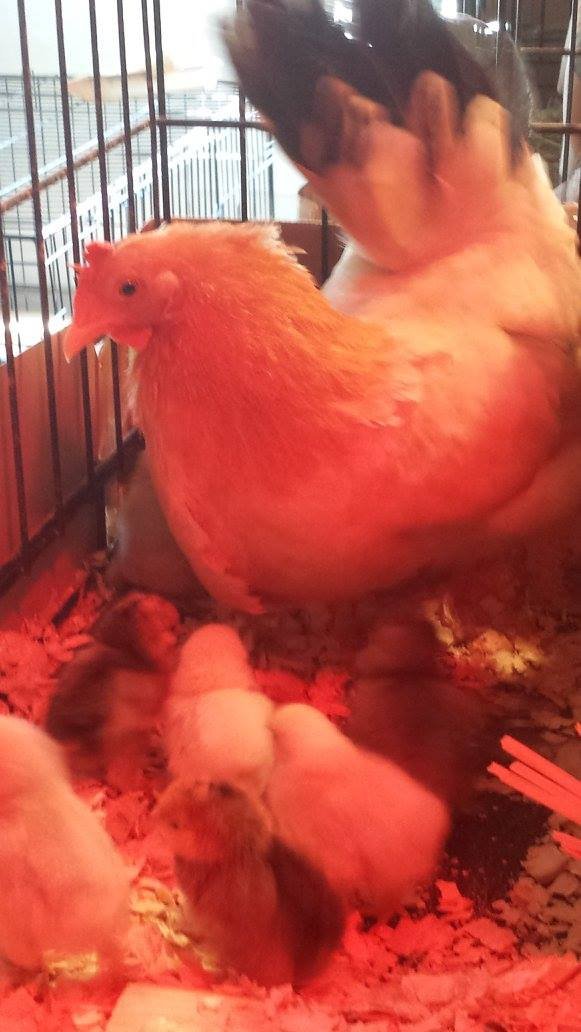
A mother hen will keep her chicks warm and protected until they are full sized pullets and or cockerels as seen with this bantam hen in our old coop. She is the buff coloured Japanese Bantam.
Every Hatch Is Different
A 100% hatch rate cannot be guaranteed, even with fresh eggs, good equipment, and careful incubation. Hatch rates vary considerably depending on fertility, egg quality, transportation, storage, incubation conditions, and natural embryo losses.
Shipped eggs can be especially unpredictable. At Wild Acres, we have experienced shipped-egg hatch rates of approximately 50% or lower. Even experienced poultry keepers using quality incubators experience unsuccessful hatches.
The important thing is to learn from each hatch, review your equipment and records, and make adjustments carefully. Hatching eggs can be challenging, but it is also a fascinating, rewarding, and sometimes addictive experience!

Electrovite and Poult-Vite can be found at your local feed store.
We breed for resistance at Wild Acres and we do not believe in vaccinating our birds. The Marek’s vaccine is a leaky vaccine. This means that it doesn’t prevent a bird from getting Marek’s, it only reduces the severity of the symptoms if they get it. In fact, rather than stop fowl from spreading the virus, the vaccine allows the disease to spread faster and longer than it normally would, a new study finds.
Vitamin deficiencies can also look like very much like Mereks:
https://thepoultrysite.com/publications/diseases-of-poultry/217/vitamin-b2-deficiency
https://www.backyardchickens.com/articles/the-great-big-giant-mareks-disease-faq.66077/
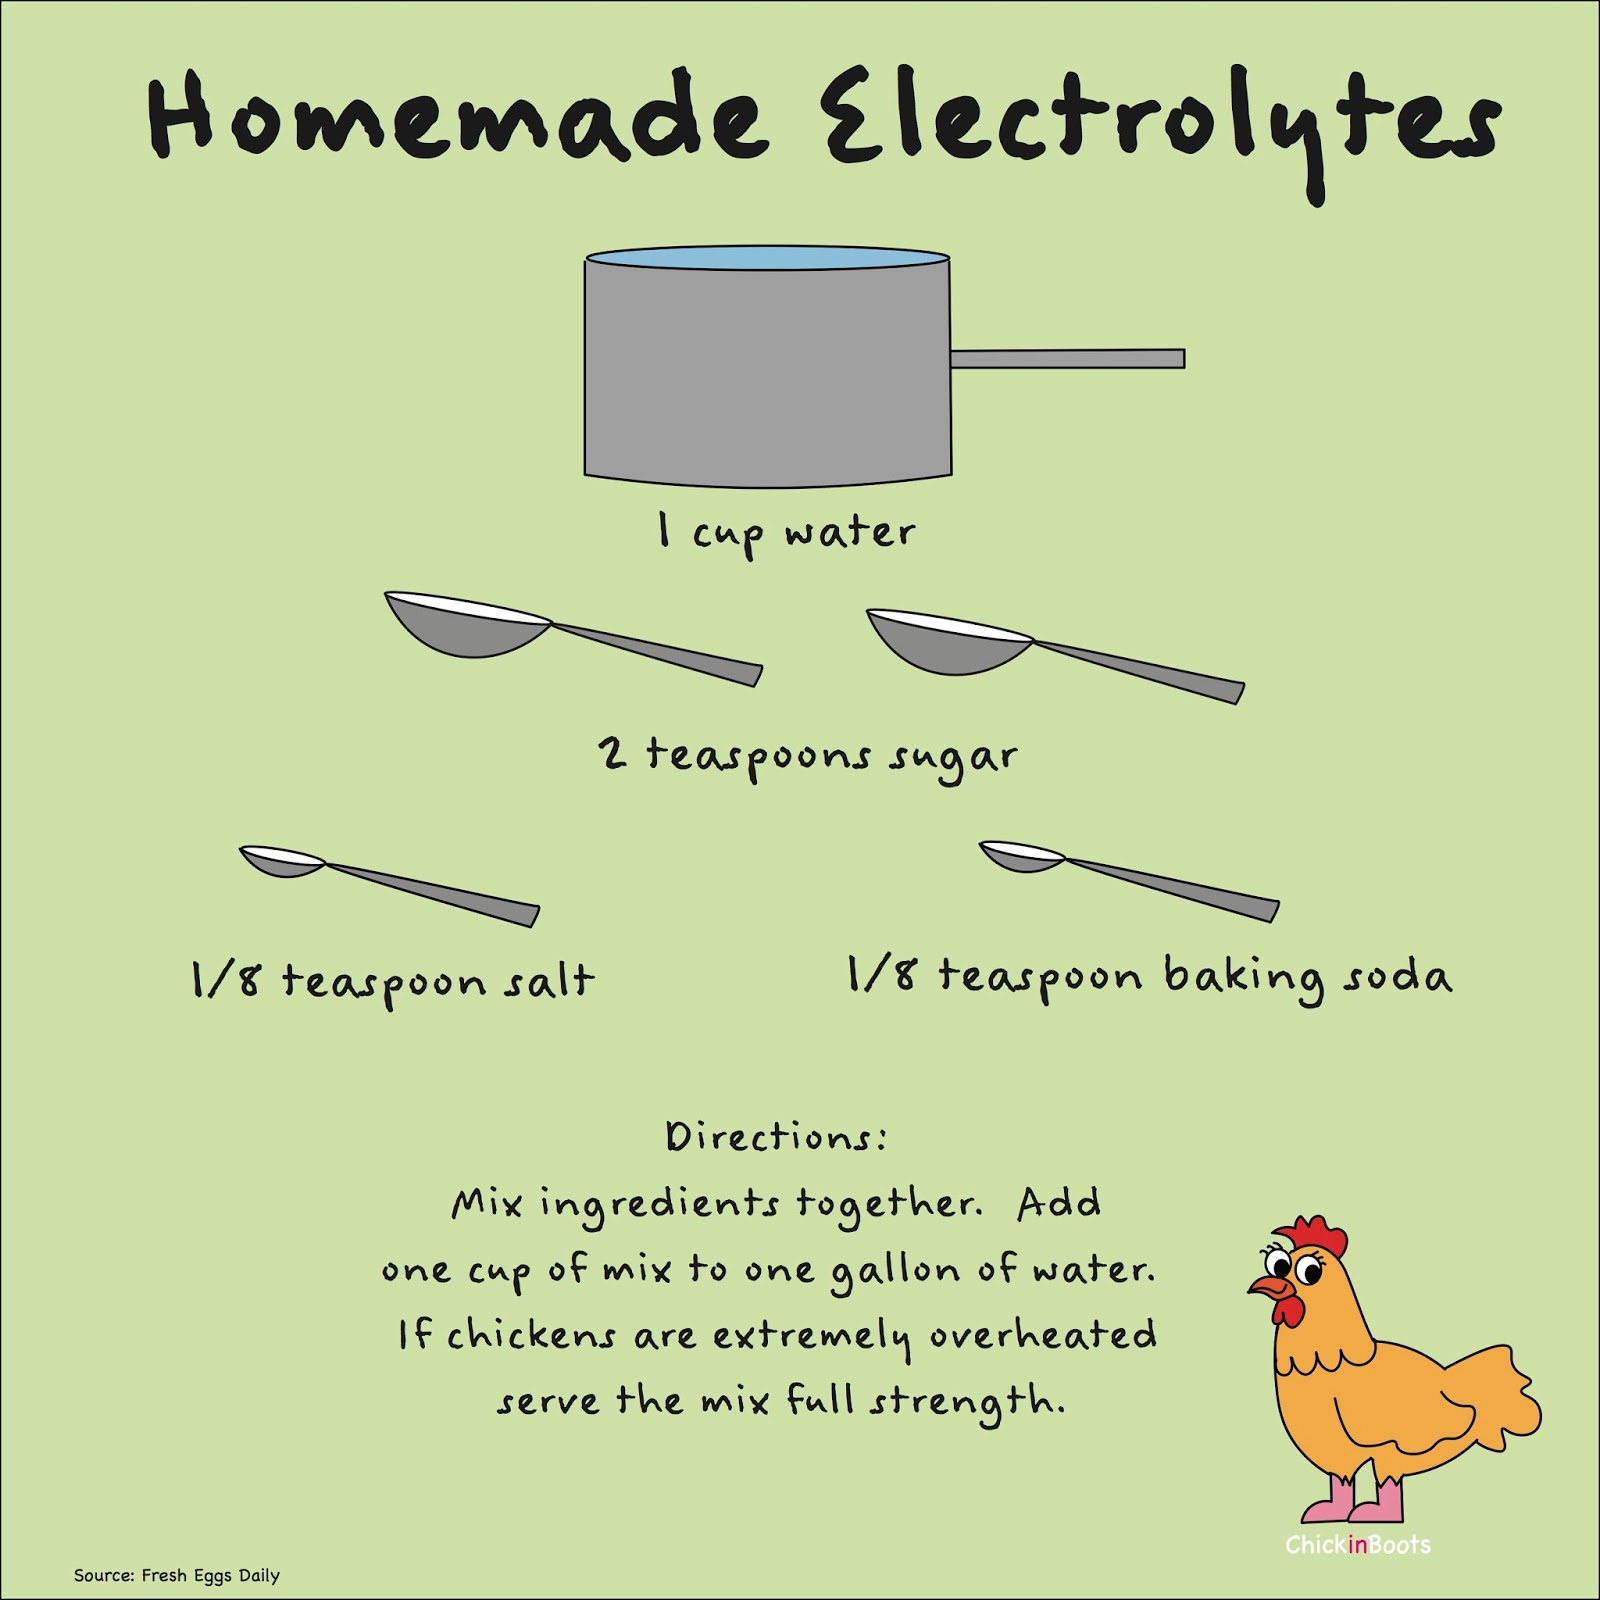
If you are living in a remote area or you need something readily available here is a homemade recipe for electrolytes.
Bragg Apple Cider Vinegar Details
- Rich in enzymes & potassium
- Support a healthy immune system
- Helps control weight
- Promotes digestion & PH Balance
- Helps soothe dry throats
- Helps remove body sludge toxins
- Helps maintain healthy skin
- Helps promote youthful, healthy bodies
- Soothes irritated skin
Apple Cider Vinegar for Poultry & Waterfowl
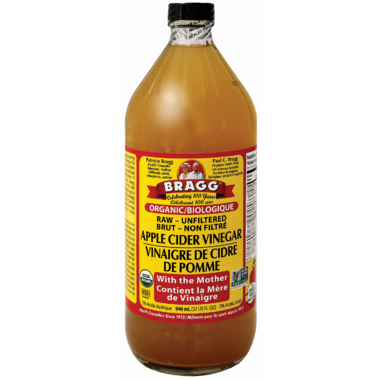
At Wild Acres, we prefer Bragg Organic Raw Apple Cider Vinegar, which is unfiltered, unheated, and unpasteurized and contains the natural “Mother.” We use it as part of our flock-care routine for chicks, ducklings, poults, and adult poultry and waterfowl.
Apple cider vinegar is traditionally used by some poultry keepers as a natural water additive. Potential benefits are thought to include:
- Supporting normal digestion and nutrient absorption.
- Helping reduce digestive and fecal odors.
- Lowering the pH of drinking water and potentially influencing digestive conditions.
- Supporting general flock condition as part of a balanced feeding and care program.
At Wild Acres, we have our own preferences and observations when using raw, unfiltered apple cider vinegar, particularly with our younger birds. However, results can vary, and it is not a substitute for good nutrition, clean water, proper sanitation, or veterinary care.
Important precautions:
- Never use vinegar in galvanized or ordinary metal waterers, as the acidity can corrode them. Suitable plastic or stainless-steel containers are preferable.
- Always provide fresh, clean drinking water.
- Do not use apple cider vinegar as a worm treatment. It is not a proven poultry dewormer.
- Avoid using it in birds with suspected digestive irritation or illness without veterinary advice.
- Do not use it as a substitute for prescribed treatment for worms, coccidiosis, or other illnesses.
Bragg Organic Raw Apple Cider Vinegar is available at many grocery stores.
Chicken Heat Stress, Dehydration and Homemade Electrolyte Solution
http://www.the-chicken-chick.com/2012/07/chicken-heat-stress-dehydration-and/
“Acidified water affects laying hens by making the calcium in her feed a little less digestible (based on chemistry….calcium is a positive ion, and dissociates better in a more alkaline environment). Professional farmers regularly add baking soda to their feed when heat stress is expected….this maintains egg shell quality when hens’ feed consumption drops due to the heat.”
In summary, during high heat conditions, baking soda facilitates calcium absorption while vinegar inhibits it. SKIP the vinegar in the heat, opting for an electrolyte solution instead.
An article from Fresh Eggs Daily:
http://www.fresheggsdaily.com/2012/07/hot-weather-acidosis-and-homemade.html
Temperatures between 55-75F (12.77-23.88C) are optimal, anything higher starts to cause stress to their bodies.
How to make a simple nipple waterer for your chick brooder –click on this link for instructions 
On our farm we do not vaccinate our chicks, so we feed them medicated chicks starter that contains Amprollium, which is a coccidiostat that reduces the growth of coccidia oocysts. Coccidiosis is the number one killer of baby chicks. Medicated chick starter is 18-20% protein, and turkey starter is 25% protein.
Grit, Feeding & Growing Poultry
Understanding Grit & Oyster Shell
Chickens do not have teeth. Instead, they use their muscular gizzard to grind food, with the help of small stones or grit.
- Young Chicks: Commercial chick starter is finely ground, so chicks eating only starter feed generally do not need additional grit.
- When Grit Is Needed: Once chickens begin eating treats, grains, greens, or other foods besides starter feed, provide appropriately sized chick grit.
- Free-Range Birds: Chickens may find small stones and grit while foraging, but we recommend making suitable grit available free choice.
- Oyster Shell: Laying hens need access to oyster shell as a separate calcium supplement to help produce strong eggshells. Do not confuse oyster shell with grit, as they serve different purposes.
Feeding Growing Pullets & Adult Hens
Around 18–20 weeks, or when pullets approach the point of lay, gradually transition them to an appropriate layer ration. Follow the feed manufacturer’s recommendations for the correct age and protein level.
At Wild Acres, we also enjoy offering our birds a varied diet that may include cracked corn, whole wheat, greens, and other suitable additions. These should be given in moderation so that a balanced poultry ration remains the main source of nutrition.
We provide appropriately sized grit for digestion and oyster shell for laying hens that need additional calcium.

Feeding Ducklings & Goslings
Waterfowl have different nutritional requirements from chickens, so choose feed specifically formulated for ducks and geese whenever possible.
- Ducklings: Provide an appropriate waterfowl starter or suitable non-medicated starter feed formulated for their nutritional needs. Gradually transition to a waterfowl grower ration as they develop.
- Goslings: Use a suitable waterfowl starter or grower feed. Provide appropriate greens and access to suitable grit as they begin eating foods that require it.
- Medicated Feed: Do not assume chicken medicated feed is suitable for waterfowl. Some medications and coccidiostats have species-specific restrictions. Always check the product label and consult your veterinarian before feeding medicated products to ducks or geese.
- Balanced Nutrition: Avoid excessive treats, bread, and other foods that unbalance their diet.

Preventing Angel Wing
Angel wing is a wing deformity sometimes seen in growing waterfowl. Nutrition and rapid growth may contribute, particularly when young birds receive an unbalanced diet or excessive energy. Provide a balanced waterfowl-appropriate ration and avoid excessive treats and bread.
For more information, see Angel Wing – Background Information.
Pasty Butt in Young Chicks
Pasty butt occurs when droppings stick to a chick’s feathers and block the vent. It can become serious if not addressed.
- Check young chicks regularly, especially during their first days in the brooder.
- If droppings are stuck, gently soften them with warm water and carefully clean the area.
- Never pull dried droppings forcefully, as this can injure the delicate skin.
- Dry the chick thoroughly and return it to a warm brooder.
- Monitor the chick for continued blockage, weakness, or other signs of illness.
Pasty butt can sometimes occur following stress, chilling, or changes in environment. If it keeps happening, check brooder temperature, hydration, and feed, and seek veterinary advice if necessary.
Growing Up: Moving Chicks Outdoors
As chicks grow and develop feathers, their need for supplemental heat gradually decreases.
- Reducing Heat: Gradually lower the brooder temperature as chicks grow, using their behaviour and a thermometer at chick level as your guide. Avoid sudden temperature changes.
- Different Heat Sources: At Wild Acres, we use different heat lamps depending on the season and the age of our chicks. Our setup includes a 250-watt red heat lamp and lower-wattage red reptile bulbs (150, 100, or 75 watts). Depending on the weather and the birds’ needs, we may use one or both.
- Adjusting for Weather: During warmer weather, or as chicks become older and more fully feathered, we may use a lower-wattage heat source or reduce supplemental heating.
- Moving Outdoors: Chicks can gradually move to a secure outdoor coop when they are sufficiently feathered, healthy, and able to maintain their body temperature. Consider nighttime temperatures, wind, rain, and shelter before making the move.
Always secure heat lamps with appropriate fittings, keep them away from bedding and combustible materials, and provide enough space for chicks to move away from the heat.
Growing Up & Introducing Young Birds to Your Flock
When to Reduce Heat
By approximately six weeks, many standard-sized chicks have developed much of their feathering. However, we recommend waiting until around eight weeks or older before completely removing supplemental heat, depending on their feather development, health, and weather conditions.
Bantams and smaller or slower-developing breeds may need supplemental warmth for longer. At Wild Acres, we provide additional warmth during cold winter weather and feed our bantams a higher-protein ration as part of our flock-care routine.
Introducing Young Birds to Adult Chickens
Take care when introducing young pullets and cockerels to adult birds. Larger, established chickens can bully, injure, or even kill smaller newcomers.
At Wild Acres, we keep our younger birds in a separate outdoor pen until they are almost fully grown.
You can also provide a protected area inside the coop, such as a small pen, kennel, or shelter with an opening that allows the younger birds to enter but keeps larger birds out. Introduce them gradually and supervise their interactions until they are safely integrated.
Feeding Our Adult Flock
At Wild Acres, our poultry receive a balanced pelleted feed along with approximately 30% mixed grains, particularly during the winter months.
Our grain mixture may include:
- Whole wheat
- Cracked corn
- Black oil sunflower seeds (BOSS)
These are part of our farm’s feeding practices. Grain and other additions should be balanced with an appropriate complete poultry ration to ensure birds continue receiving the protein, vitamins, minerals, and other nutrients they need.
Greens, Supplements & Treats
Our poultry enjoy fresh greens, alfalfa and small amounts of fruit as occasional additions to their diet. At Wild Acres, we also use Ultra-Kelp meal periodically, particularly during breeding season and cold winter weather. These additions should complement a balanced poultry feed, not replace it.
Grit, Oyster Shell & Dust-Bathing Areas
- Grit: Provide appropriately sized poultry grit to help birds grind food in their gizzards, especially when they eat whole grains, greens or other foods beyond their regular feed.
- Oyster Shell: Laying hens need an additional source of calcium for strong eggshells. Offer oyster shell separately so laying hens can take what they need. Avoid giving growing chicks and pullets unrestricted extra calcium.
- Dust-Bathing Areas: Chickens enjoy a dry area with loose soil or coarse sand for dust bathing. Ducks also enjoy shallow tubs or trays where they can dabble and explore.
Check birds regularly for lice and mites and use appropriate poultry-safe treatments if needed.
When Will Your Hens Start Laying?
At Wild Acres, our pullets generally begin laying at around six months of age, but this can vary considerably. Factors include:
- Breed: Some heritage and slower-maturing breeds take longer to reach laying age.
- Hatch Date & Season: Daylight hours and the time of year a pullet matures can affect when she begins laying.
- Nutrition: A complete, age-appropriate feed and good body condition support healthy development and egg production. Too many treats or grain additions can dilute the nutrients in a balanced ration.
- Health & Stress: Illness, parasites, poor condition and environmental stress can delay laying. Check regularly for signs of lice and mites, and seek veterinary advice about parasite testing and treatment when needed.
Patience is important. Each bird develops at its own pace, and a later start does not necessarily mean there is a problem.
Please find more helpful information on our link page.(click here)
Troubleshooting: Why Are My Chicks Getting Sick or Dying?
Question: “Two more of my chicks have died. Do you have any idea what could be going on?”
There can be several reasons chicks become sick or die. Check their brooder conditions, food and water first, but remember that illness, infection or developmental problems may also be responsible.
- Too cold: Chicks may huddle together, peep loudly and become inactive. Make sure they have a warm area and are protected from drafts. An 18-inch brooder guard can help.
- Too hot: Chicks may pant, hold their beaks open or move away from the heat. Provide a cooler area where they can move away from the heat source.
- Wet or dirty bedding: Keep bedding dry, clean the brooder regularly and provide good ventilation without drafts.
- Not enough food or water: Make sure every chick can easily find and reach fresh chick starter and clean water. Place feeders and waterers in accessible locations, but not directly under the heat lamp. Gently dip each chick’s beak once in the water to help it locate the water.
- Contaminated water: Keep waterers clean and free of droppings and shavings. Raise them slightly if needed, while ensuring chicks can still reach them.
- Stress and handling: Young chicks need warmth and rest. Avoid excessive handling, loud activity and frequent disturbances.
Supplements & Treatment
Electrolytes or poultry-specific vitamins may help during periods of stress when used according to product directions. However, apple cider vinegar, garlic and supplements are not treatments for illness. Do not use antibiotics or medicated feed as a general solution; consult a veterinarian for appropriate treatment.
Important: If chicks are weak, not eating or drinking, having trouble breathing, or dying unexpectedly, contact a poultry veterinarian promptly. Several chick deaths may require a veterinary examination or post-mortem to identify the cause.
Act quickly when chicks are unwell. Young chicks can deteriorate very quickly.